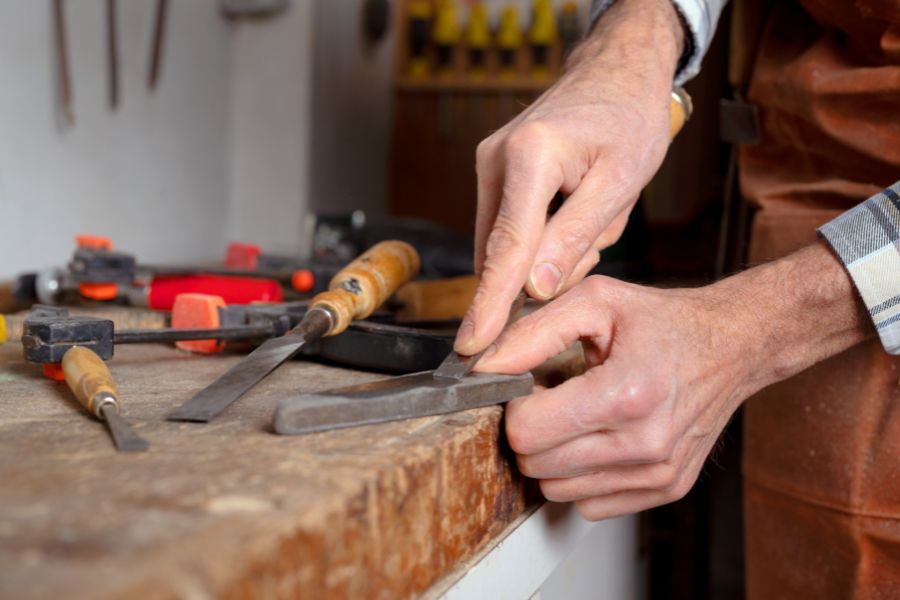
Have you ever ruined a beautiful piece of oak? Dull tools tear wood fibers into an ugly mess. It is deeply frustrating and wastes expensive lumber. You can fix this annoying problem very quickly today. Learning how to properly sharpen hand chisels and plane blades changes everything. A sharp tool sings through hard wood with zero effort. Your cuts become clean, crisp, and incredibly precise instantly. It is time to upgrade your daily workshop experience. We will explore the absolute best edge maintenance methods together. Prepare to elevate your manual craft to elite levels. You will never dread tool maintenance sessions ever again. Knowing how to Sharpen Hand chisels and plane blades brings immense joy. Your confidence in the workshop will grow very rapidly. Woodworking becomes a peaceful meditation rather than a frustrating struggle. Get ready to transform your dull steel into razor blades.
The Core Gear to Sharpen Hand chisels and plane blades
Quality woodworking tools require excellent abrasive materials for proper maintenance. You do not need a massive budget to start out. A few core items will build your ultimate sharpening station. These robust tools will last a lifetime if treated well. If you plan to build beautiful and custom furniture projects in various hardwoods, sharp tools are mandatory. Good gear makes the entire learning process much more enjoyable. Get your bench ready for some serious metal polishing action. You will save money by avoiding useless, cheap gimmicks entirely.
Every master artisan started exactly where you are right now. We will explore the absolute best options available right now. Let us build a reliable station that works for you. Clean cuts demand a dedicated area for your abrasive tools. Prepare to master your sharpening technique with confidence today.
Picking Your Perfect sharpening stones
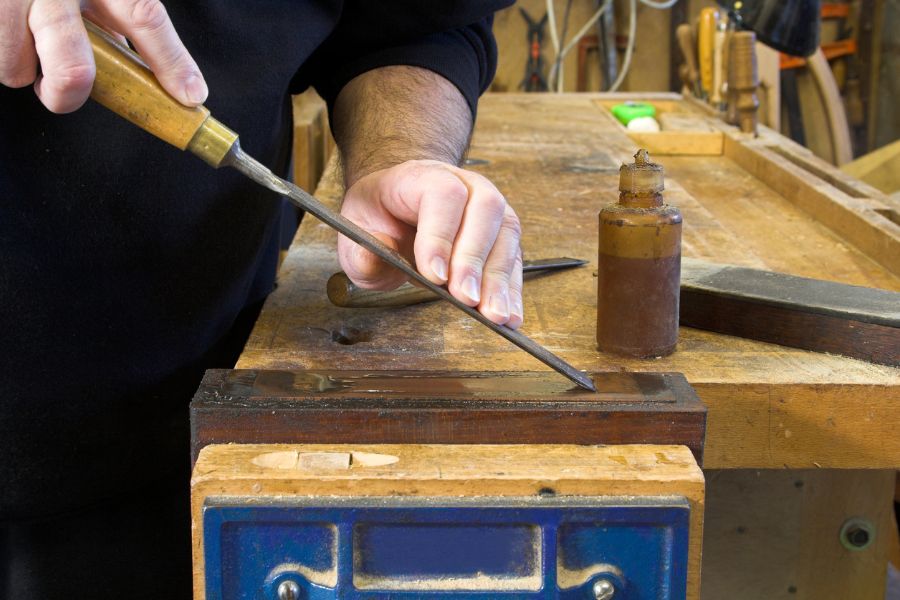
The market offers many different abrasive stone options today. Water stones are extremely popular among traditional craftsmen everywhere. They cut fast and offer great tactile feedback during use. However, they require frequent flattening to remain truly effective always. This adds extra maintenance time to your daily workshop routine. Oil stones are another classic and very reliable choice. They are much harder and stay flat much longer. You must choose what fits your personal workflow best. I prefer a setup that requires minimal daily fuss. Always keep your sharpening stones safe in a closed box.
Dust and debris will ruin their delicate abrasive surfaces quickly. Clean tools always perform better in the long run. When you Sharpen Hand chisels and plane blades, cleanliness matters immensely. A dirty stone leaves deep, ugly scratches on your metal. Find a dedicated spot in your shop for this task. You will appreciate the organization when you need a touch-up.
The Power of a Solid diamond plate
Many modern woodworkers prefer a heavy steel diamond plate. These metallic plates remain perfectly flat forever without any maintenance. They will never dish or warp under heavy downward pressure. This rugged durability makes them an incredible shop investment. I use a coarse plate for heavy edge reshaping tasks. They cut through hardened tool steel incredibly fast and smoothly. You just splash some basic glass cleaner right on them.
The fluid sweeps away the tiny metal shavings instantly. A good diamond plate saves you hours of tedious repair work. It provides a reliable foundation for all your edge geometry. You will never regret buying a premium diamond abrasive surface. It is a fantastic asset when you restore old tools. Flattening backs is much faster on a fresh diamond surface. Your arms will not get tired during long grinding sessions. This is how you Sharpen Hand chisels and plane blades efficiently.
Understanding Proper oil lubrication Options
Traditional Arkansas stones absolutely require proper oil lubrication always. This fluid prevents metal swarf from clogging the porous stone. If the tiny pores clog, the stone stops cutting entirely. A glazed stone feels completely slick and utterly useless. Apply a few drops of light mineral oil very often. Wipe the dirty, dark oil away after every sharpening session. This simple habit keeps your natural stones cutting aggressively.
Never use thick motor oil on your delicate stones. It creates a gummy, sticky mess that ruins the surface. Keep a small rag nearby to clean your hands quickly. A clean workstation prevents oil lubrication from staining wood projects. Using the correct fluid prolongs the life of your stones. It also guarantees a smoother feel during the abrasive stroke. When you Sharpen Hand chisels and plane blades, friction is bad. Proper fluids keep the metal gliding across the abrasive effortlessly.
Mastering Your Edge and bevel angle
Edge geometry dictates how your tool cuts the raw wood. A steep angle provides great strength for heavy chopping tasks. A shallow angle slices through softwoods with zero physical resistance. You must adapt your tools to your current project needs. To see how a strong dovetail joint compares to other woodworking joints, precise angles make all the difference.
Understanding these angles separates beginners from truly advanced, skilled craftsmen. Let us optimize your tools for maximum cutting efficiency today. It is essential to Sharpen Hand chisels and plane blades correctly. A bad angle ruins the cutting experience almost instantly. Let us fix your tool geometry for good right now. You will feel the difference on your very next cut.
Finding the best sharpening angles for woodworking hand tools
Woodworking requires specific blade geometry for different daily tasks. The best sharpening angles for woodworking hand tools vary slightly. They typically fall exactly between 25 and 35 degrees. A 25-degree bevel angle is absolutely perfect for paring pine. It slices cleanly but remains quite fragile under heavy impact. Do not strike a 25-degree edge with a heavy mallet. For chopping dense hardwoods, you need a 30-degree angle. This provides the necessary steel strength directly behind the edge. I usually establish a primary bevel at exactly 25 degrees.
Then I add a tiny 30-degree secondary micro-bevel quickly. This clever hybrid trick saves so much time during maintenance. You only polish a tiny fraction of the hard steel. This technique helps you Sharpen Hand chisels and plane blades faster. It maximizes cutting power while minimizing your manual labor. Your tools will stay sharper much longer with this geometry.
Why You Must Use a Reliable honing guide
Freehand sharpening takes years of daily practice to master fully. Consistency is the real secret to a perfect, lasting edge. A honing guide holds your blade at a rigidly locked angle. It eliminates all human error from the entire abrasive process. You simply clamp the steel tool firmly inside the jaws. Set the exact projection length using a simple wooden block. Then you roll the assembly smoothly across your abrasive surface. It guarantees repeatable, flawless success every single time you sharpen. Even master craftsmen use them for demanding precision tasks often.
Do not let anyone shame you for using this tool. When you Sharpen Hand chisels and plane blades, results matter most. A guide ensures your bevel angle is perfectly square always. This is critical for hand planes to function correctly always. A skewed plane blade will ruin your flat wooden boards. Use a honing guide and remove all the stressful guesswork entirely.
Learning how to use a honing guide for sharp chisels
Proper setup is absolutely crucial for getting good, reliable results. Knowing how to use a honing guide for sharp chisels is easy. First, ensure the chisel sits perfectly square in the jaws. A skewed tool will grind an unwanted, crooked angled edge. Tighten the brass clamping screws evenly on both sides firmly. Roll the wheel smoothly back and forth across the stone. Apply downward pressure right above the actual steel bevel.
Do not press heavily on the guide wheel itself. Let the sharp abrasive particles do the hard cutting work. Check your progress often under a bright shop light source. You will see the fresh steel shining back at you. This visual feedback tells you exactly where the stone cuts. You must Sharpen Hand chisels and plane blades with keen observation. Never work blindly without checking the steel surface very often. This prevents you from making huge, time-consuming geometric mistakes.
The Step-by-Step Restoration Process
Now we put steel to stone with very clear intent. This systematic approach guarantees a razor edge every single time. Follow these specific steps meticulously for the best possible results. Patience and consistency are your two greatest workshop allies always. Prepare your station and take a deep, relaxing breath now. We are going to Sharpen Hand chisels and plane blades perfectly. Your woodworking projects will improve dramatically after this simple session.
Following a rigid system prevents you from skipping crucial steps. Good habits create amazing edges that last for many weeks. Turn on some music and enjoy the peaceful grinding process.
Establishing a Perfect flat backing
You cannot achieve true sharpness without a perfectly flat back. The cutting edge intersects the bevel and the back directly. Establishing a flat backing is a grueling one-time job. It is absolutely critical for all your future sharpening success. Rub the back firmly on your coarsest abrasive plate. Keep the tool completely flat against the surface at all times. Continue until uniform scratches cover the entire steel width evenly. Progress systematically through your medium and fine grits next. Polish the back until it reflects light beautifully and clearly. Skip this crucial step, and your tools will always fail.
You only have to do this grueling work one time. After the flat backing is perfect, it stays flat forever. You must Sharpen Hand chisels and plane blades with proper foundations. A polished back guarantees the sharpest possible apex on steel. Take your time and get this step absolutely perfect today.
The Importance of Proper burr removal
Grinding the bevel creates a tiny, fragile wire edge. This is called a burr, and it is very crucial. You must feel this burr across the entire flat back. It means you have removed steel right to the apex. Proper burr removal is an absolutely essential final step. A fragile burr will snap off deep inside the wood. This leaves a dull, jagged edge behind almost immediately. Lightly swipe the flat back across your finest abrasive stone.
You will feel the wire edge detach instantly and cleanly. This leaves a hyper-sharp intersection of beautifully polished steel. This step is vital to Sharpen Hand chisels and plane blades. Without executing proper burr removal, your tool is essentially completely dull. You will feel the difference on your very first cut. The tool will glide smoothly without any annoying rough resistance.
Polishing for Elite Shop Performance
Stopping at your finest stone yields a very sharp tool. Taking it one step further unlocks truly elite performance. Extreme polishing removes microscopic scratches left by the fine stones. This creates an edge that glides effortlessly through dense hardwood. Let us explore the final secrets of extreme, flawless sharpness. Your tools are about to reach a whole new level. You will love how they Sharpen Hand chisels and plane blades. The final polish is where the real magic happens daily. Woodworking becomes effortless when your tools are polished perfectly.
Secrets to getting a mirror finish on hand plane blades
A highly polished edge cuts cleaner and stays sharp longer. Getting a mirror finish on hand plane blades is deeply rewarding. You must progress through all your grits very patiently. Never jump to a finer stone too quickly during sharpening. The current stone must erase all previous deep scratches entirely. Inspect the steel under a bright light source very often. Once you reach your highest grit, the steel shines brightly. A hazy finish means you rushed the earlier abrasive steps. A true mirror finish reflects text clearly without any distortion. This pristine surface reduces friction drastically during heavy wood cutting.
Knowing how to Sharpen Hand chisels and plane blades takes observation. The mirror polish proves you did the job perfectly right. Your plane will create thin, beautiful shavings that look transparent. This is the ultimate goal of every serious hand tool worker.
Using a leather strop Effectively
The final polish requires a very simple workshop tool. A leather strop is flat leather glued to hard wood. You load the leather heavily with green polishing compound paste. Drag the bevel backward across the leather ten times firmly. The microscopic abrasives polish the hard steel beautifully and quickly. This entirely erases any remaining visible abrasive scratches instantly. This is the ultimate secret to terrifying tool sharpness everywhere. A stropped tool leaves a glowing, smooth surface on wood. You will not need sandpaper after using this amazing leather strop.
Strop frequently during your work to maintain the keen edge. It is the best way to Sharpen Hand chisels and plane blades. Stropping takes only seconds but saves you hours of grinding. Keep it directly on your workbench during all your projects. A quick strop restores a fading edge almost by magic.
Exploring Different Tool Steel Types
Modern woodworkers have access to many incredible tool steel alloys. The metal dictates how often you must visit the stones. Some steels are very easy to grind but dull quickly. Other premium alloys take forever to sharpen but last weeks. Understanding your metal helps you plan your maintenance routine perfectly. Let us look at the most common options available today. This knowledge is vital to Sharpen Hand chisels and plane blades. Different metals require slightly different approaches on the sharpening bench. Pick the steel that matches your patience and workflow best.
Traditional High Carbon O1 Steel
Vintage tools often use traditional high carbon O1 steel. This metal is famous for taking an incredibly keen edge. It sharpens very quickly on standard water stones or oil stones. The feedback is wonderful, making it a joy to maintain. However, it loses that extreme sharpness relatively fast during heavy use. You will need to touch up the edge more frequently. It is perfect for delicate paring cuts in soft woods. Just keep your strop handy on the bench at all times. It is easy to Sharpen Hand chisels and plane blades here. O1 steel responds beautifully to a fine natural Arkansas stone. You can achieve a terrifying edge in just a few minutes. It is a fantastic steel for beginners learning to sharpen properly.
Modern A2 and PM-V11 Alloys
Modern toolmakers often use tough A2 or PM-V11 steel. These advanced alloys hold a sharp edge for a very long time. They are highly resistant to chipping in hard, knotty woods. However, they are significantly harder to grind on traditional stones. You really need a good diamond stone for these tough metals. They take more time to polish, but the durability is unmatched. Many professionals prefer these steels for heavy, continuous daily work. They allow you to work longer without stopping to sharpen. When you Sharpen Hand chisels and plane blades, these resist wear. You must be patient when grinding the primary bevel angle. The extra effort is worth it for the prolonged edge life. They are amazing for chopping deep mortises in solid white oak.
Common Pitfalls to Avoid Always
Beginners often stumble into a few predictable, frustrating sharpening traps. Recognizing these errors early saves you hours of wasted frustration. Woodworking is a true test of your attention to detail. Let us highlight the traps you absolutely must avoid completely. Keep your edges pristine and your workflow completely uninterrupted today. It is critical to Sharpen Hand chisels and plane blades carefully. Avoid these mistakes to ensure a stress-free shop experience forever. Learn from these errors and protect your expensive hand tools.
Rushing the Sequential Abrasive Grits
Woodworkers often move to finer stones way too early. Each grit must erase the previous scratch pattern entirely. Rushing leaves deep scratches that severely weaken the final edge. These hidden flaws cause the blade to chip very quickly. Take your time and trust the abrasive process fully. Focus on creating a uniform matte finish first on steel. The shine will come naturally on the final polishing stones. Patience here pays massive dividends during your final project assembly. Slow down and enjoy the rhythmic, peaceful sharpening process. To Sharpen Hand chisels and plane blades, you need absolute patience. A rushed job always results in a fragile, useless edge. Check your work frequently and never skip a needed grit.
Applying Incorrect or Uneven Pressure
Uneven downward pressure ruins the geometry of your favorite tools. Pressing too hard creates a skewed, completely useless cutting edge. You must distribute your weight evenly across the entire bevel. Do not force the tool into the stones aggressively. Let the sharp abrasive particles do the heavy cutting safely. A relaxed, smooth motion produces much better, consistent results. Your hands should never cramp during a long sharpening session. Let the tool float smoothly across the wet abrasive stone. Consistency beats aggressive physical force in the workshop environment always. You will Sharpen Hand chisels and plane blades much better relaxed. Keep your wrists locked and sway your entire upper body. This provides maximum stability during the long abrasive stroke.
FAQ
How often should I Sharpen Hand chisels and plane blades?
You should touch up your edge as soon as it feels sluggish. Never wait until the tool is completely dull and useless. Frequent stropping keeps the edge keen for a very long time.
Can I skip grits to save time on stones?
No, skipping grits leaves deep scratches that weaken the metal edge. You must progress through coarse, medium, and fine stones sequentially. This ensures a strong, durable, and highly polished cutting edge.
What is the best stone for a complete woodworking beginner?
A double-sided diamond stone is the most foolproof option for beginners. It never needs flattening and cuts all modern steel types quickly. It is a fantastic, worry-free investment for your new workshop.
Why does my chisel edge chip when cutting dense hardwood?
Your bevel angle is likely too shallow for that dense wood. Increase the angle to thirty degrees to add more steel support. This makes the delicate edge much stronger against hard impacts.
Do I need a honing guide if I have steady hands?
A guide is not strictly mandatory, but it guarantees perfect consistency. Even experienced professionals use them to save time and prevent errors. It takes the frustrating guesswork completely out of edge maintenance.
Is learning how to properly sharpen hand chisels and plane blades difficult?
It requires some patience, but the basic mechanics are very simple. With a good guide and flat stones, anyone can learn quickly. Muscle memory develops fast if you practice the techniques regularly.