
You spent a full Saturday hauling bags of river rock from the trunk to the backyard. By Tuesday, half the stones had sunk into the soil, and the color you picked at the garden center looked nothing like it did under the store’s fluorescent lights. Sound familiar? Picking landscaping stones seems straightforward until the driveway is littered with bags you can’t return and the project looks worse than bare dirt.
Most homeowners learn the hard way that stone selection involves more than grabbing whatever is on sale at Home Depot or Lowe’s. The material, size, finish, and base preparation all matter, and getting even one of those wrong leads to wasted money and a yard that needs a do-over within a year.
The sinking problem nobody warns you about
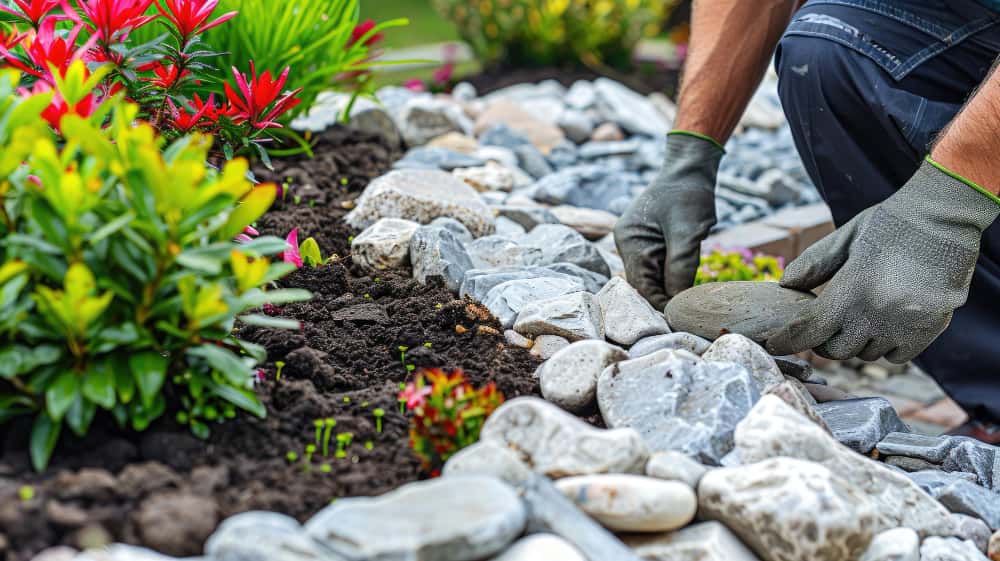
Skipping ground preparation is the single most expensive mistake in stone landscaping. Rocks placed directly on topsoil will migrate downward with every rain, freeze-thaw cycle, and foot traffic event. Within a season, you lose 30 to 40 percent of your visible stone layer into the ground.
The fix is simple but non-negotiable: landscape fabric and a compacted base. For walkways and high-traffic zones, a 2-inch layer of compacted crusher dust under the fabric gives stones something solid to sit on. For garden beds and borders, fabric alone usually does the job as long as you clear organic debris first. Suppliers like decorative landscaping stones typically publish coverage calculators and prep instructions, which saves guesswork on depth and quantity. The general rule is 2 inches of stone depth minimum for beds and 3 inches for paths.
One detail that catches people off guard: weed barrier fabric is not all the same grade. The thin stuff from big-box stores tears during installation and degrades within two seasons. Commercial-grade woven geotextile costs a few dollars more per linear foot and lasts a decade. That small upgrade eliminates the cycle of pulling stones, replacing fabric, and re-laying everything.
Color shift is real
Here’s a scenario that plays out constantly. Someone picks a bag of polished black pebbles, brings them home, spreads them in a dry garden bed, and two weeks later the stones look dusty gray. They’re not defective. Polished stones look their darkest when wet or freshly washed, and they appear lighter once dry and exposed to sun and dust.
The reverse happens too. Matte beige stones in a bag look muted and neutral. Lay them around green shrubs with regular sprinkler coverage and they take on a warm golden tone that may or may not match the house exterior.
Before committing to 30 or 40 bags, order samples. Spread them in the actual spot where they’ll live, leave them for a few days through sun and rain, and see how the color settles. Most reputable stone suppliers offer sample bags for under $15, and that small expense prevents a much larger regret. If the project involves pavers from Belgard or Techo-Bloc, test the stone color next to those pavers specifically. Color clashes between hardscape elements are obvious once installed and painful to fix.
Buying by price per bag instead of price per square foot
A 50-pound bag of pea gravel at Lowe’s runs about $5. A 22-pound bag of polished landscape stone from a specialty supplier might run $25 or more. On the surface, the gravel looks like the smarter buy. But coverage tells a different story.
Pea gravel compresses and displaces easily. You need 3 to 4 inches of depth for any kind of stability, which means roughly 3 bags per square foot at that depth. Your $5-per-bag deal just became $15 per square foot, and the gravel will still scatter into the lawn every time someone walks through it.
Heavier polished or semi-polished stones in the 1-to-3-inch size range sit more firmly. At 2-inch depth, one 22-pound bag covers about 1 to 1.5 square feet and stays put. The per-square-foot cost often ends up comparable, and the finished look is substantially more refined. The material also doesn’t need topping up every spring the way loose gravel does.
Run the math before you buy. Measure your area in square feet, check each product’s coverage rate at your target depth, and calculate total bags needed. A 200-square-foot patio border that looks like a 10-bag job often turns out to need 40 or 50 bags once you account for proper depth.
Size matters more than you think
Small stones (under 1 inch) work well as ground cover and between stepping stones. Medium stones (1 to 3 inches) are the most versatile, handling borders, garden beds, and drainage channels. Large stones (3 to 6 inches) make strong visual statements around water features or as accent clusters but are impractical for walkways.
Mixing sizes within the same bed creates a natural, layered look. A bed of uniform 2-inch stones reads as artificial. Blend in a few 3-to-4-inch pieces and some smaller filler, and the result feels closer to what you’d see along a natural shoreline. That size variation is one of the reasons hand-selected natural stone outperforms mass-produced aggregate in design projects.
Drainage: the overlooked function
Stones aren’t just decorative. They manage water. A well-planned stone bed around a foundation redirects rainwater away from the house, reducing hydrostatic pressure on basement walls. French drain trenches lined with angular stone (not rounded pebbles, which pack too loosely) move water efficiently to a discharge point.
For anyone dealing with grading issues or soggy spots in the yard, a dry creek bed made from a mix of cobblestones and river rock solves the problem while looking intentional. The key is using stones large enough to resist washout during heavy rain, typically 3 inches or bigger for the creek channel with smaller accent stones along the banks.
Rounded polished pebbles have their place, but not in drainage applications. Their smooth surface lets water sheet across rather than percolate through, and they shift under flow pressure. Save the polished material for visible decorative areas and use rougher, angular stone where water management is the priority.
Maintenance realities
Stone landscaping is low maintenance. Not zero maintenance. Organic debris, leaf litter, and windblown soil accumulate in stone beds and eventually support weed germination right on top of your fabric barrier. A leaf blower on low setting once a month keeps beds clean. For polished stones that have dulled, a garden hose rinse restores the finish.
Expect to top up stone beds every 3 to 5 years as settling and minor displacement occur. Budget for a 10 to 15 percent material reserve when you place your initial order so the replacement stone matches the original batch in color and size. Dye lots in natural stone vary, and buying a “close match” three years later often means a visible patchwork.
The payoff for all this planning is a yard that holds its look for years without the seasonal replanting, mulch replacement, and constant watering that organic landscaping demands. Stone doesn’t rot, doesn’t attract termites, and doesn’t wash away in the first storm. Done right, it’s one of the few landscaping investments that genuinely lasts.